EASY INSTALLATION

Designed for easy DIY installation

Inground Trampoline Installation Image

Watch our easy installation video

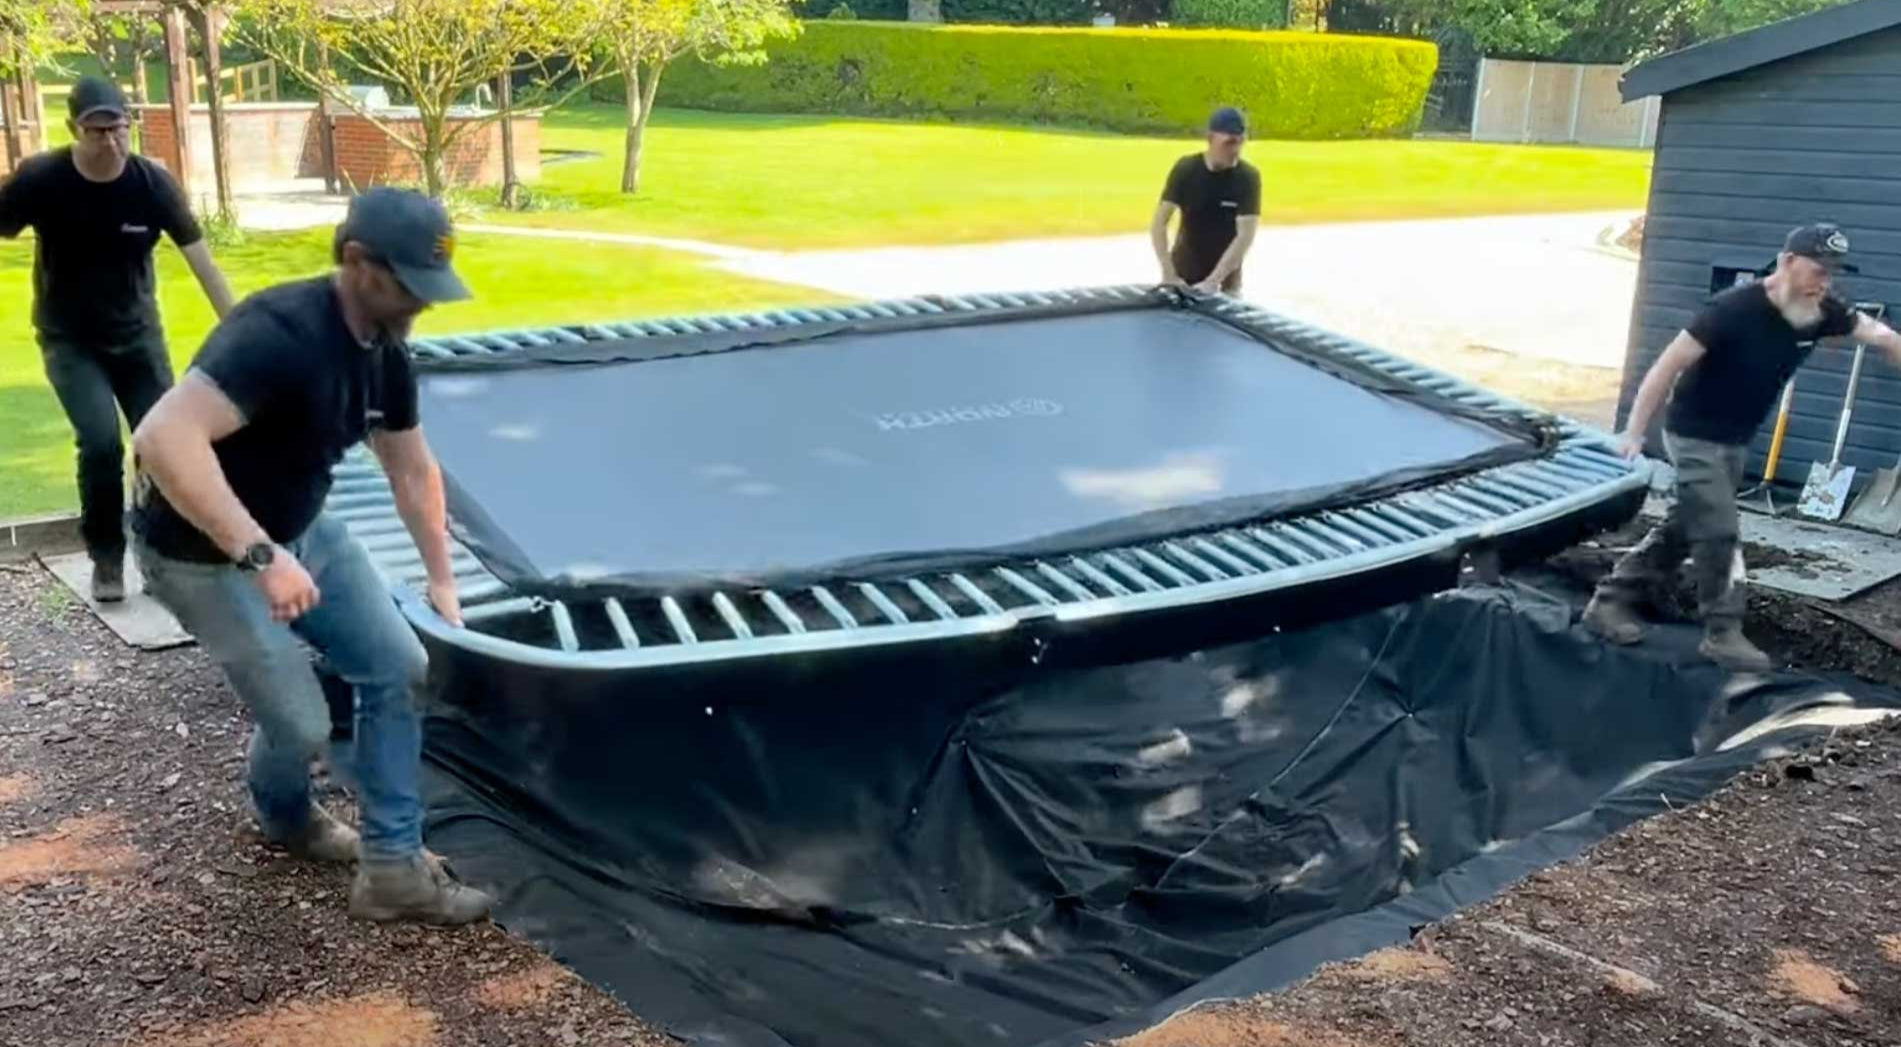
North In-ground Trampoline Kits have been designed for ease-of- assembly and DIY install. Over 80% of our customers do the assembly and installation themselves, or with the assistance of family and friends.

Many customers also use local gardening or landscape companies or just employ some local muscle to assist with the digging of the hole. 

if you're using a landscaper send them the link to this page so they can watch the explainer video or print off the fully downloadable instructions below.

Manual for Rectangle Inground Trampolines Manual for Round Inground Trampolines

1. Dig the hole

Mark out a hole that is a few inches wider in diameter than your trampoline. This is to give you a little extra room when you place the trampoline in the hole.

Dig out 18cm of soil evenly across the entire hole. Then dig an inner hole in the middle that is 2ft or 80cm less in diameter than the trampoline size in a bowl shape to the depth stated on your instructions. This will leave a ledge onto which the trampoline frame will sit.

TOP TIP
It's hard to be precise with the hole measurement - the extra few inches will make it easier for you. This extra space will be back-filled at the end. Keep some of your excavated top soil close by the hole for back filling.

2. Assemble the frame

Assemble the top and bottom sections of the trampoline frame, attach mat and springs and fix the retaining wall to the outside of the frame.

TOP TIP
Attach springs at 12 o'clock position, then 6 o'clock followed by 3 o'clock and 9 o'clock first - this will give even tension and make it easier to fit the rest.

3. Site the trampoline into the hole

Lift the trampoline into the hole and place on the ledge ensuring the frame is at the correct height. Then back-fill in the gap on the outside of the frame, compact the soil and re-turf.

TOP TIP
Use the handle of your spade to compact the soil down as tight as possible when back-filling.

4. Attach the vented pads

Finally attach the vented pads to the frame & you're ready to enjoy your In Ground Trampoline!

TOP TIP
Use a long screwdriver to help push the elasticated toggles down between the trampoline frame and the retaining wall in order to secure the pads to the trampoline.

5. JUMP!

Enjoy many years of family fun and exercise on your new North Inground Trampoline!

HOLE DIMENSIONS

Trampoline size / outer hole diameter Inner hole diameter Minimum Hole depth (Z)

Rectangle 300 cm x190 cm

260 cm x 150 cm

90 cm

Rectangle 360 cm x 250 cm

320 cm x 210 cm

100 cm

Rectangle 460 cm x 310 cm

420 cm x 270 cm

110 cm

Rectangle 520 cm x 370 cm

460 cm x 310 cm

120 cm

Round 300 cm

260 cm

100 cm

Round 430 cm

390 cm

110 cm

How long will it take to install?

Our trampolines have been designed to install yourself, how long it takes depends on the size of trampoline you choose and whether you dig by hand or hire an excavator. Digging by hand we'd say allow a weekend to complete the job, if you hire an excavator you'll easily do it in a day.

Do I need to build a retaining wall?

No! Our in-ground trampoline kit has a retaining wall built in, making it even easier to install at home. The retaining wall easily screws onto the frame into pre-drilled holes.

Do I need to hire an excavator?

This depends on the size of trampoline you choose and how energetic you're feeling!

We'd recommend digging the 10ft and 10ft x 6ft sizes by hand as it's actually easier to get the bowl shape you need with a spade than an excavator. But for the largest sizes hiring an excavator will definitely make less work for you.

How much soil do I need to excavate and how do I dispose of it?

The amount of soil you need to excavate will vary depending on which size trampoline you are installing.

For the smaller size trampolines you will fill a 6-yard skip (300 cm x 190 cm, 300 cm) for the medium size trampolines you will fill an 8-yard skip (360 cm x 250 cm) and for the larger trampolines (430 cm, 460 cm x 310 cm and 520 cm x 370 cm) you may need to arrange for a grab lorry to come and collect the soil.

If you are able to use the soil in your garden for raised beds or levelling ground etc. then you will save the cost of a skip or grab lorry!

Do I need to add drainage?

In most cases, a simple soak away as described in the instructions should be sufficient to ensure your trampoline pit drains well. For some gardens that have a high density of clay you may need to consider alternative drainage options such as the ones outlined in our blog.

How much room should I leave around my trampoline?

If you do not have a net on your trampoline then you should leave at least 1.5m around the perimeter of the trampoline to avoid the user bouncing off the trampoline into a potential hazard such as a tree or fence.

You should also make sure that there are no hard surfaces within this area such as a stone pathway.

How do I look after my Inground Trampoline?

Fortunately, the North Inground Trampolines are relatively maintenance free! It always helps to prolong the life of your trampoline pads and jump mat if you purchase a cover.

Likewise keeping your trampoline clean of general garden debris such as fallen leaves, twigs and mud will help maintain all elements of the trampoline. We recommend that you check all parts regularly and replace any worn out parts as soon as you notice them.

DON'T FANCY GETTING YOUR HANDS DIRTY?

You have options! You can use any landscape gardener for this easy project. just send them a link to this page and ask for a quote. Alternatively, our expert in-house team can install your North Inground Trampoline for you! London and home counties only. Please fill in the enquiry form below and we'll get in touch!